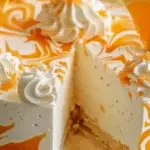
No-Bake Orange Creamsicle Cheesecake is a creamy, citrusy dessert that tastes just like the classic frozen treat—but in cheesecake form. I love how it blends bright orange flavor with smooth vanilla cream and a buttery crust, all without turning on the oven. It’s light, refreshing, and perfect for warm days or whenever I’m craving a nostalgic dessert.
Why I Love This Recipe
I love this cheesecake because it’s simple, stunning, and packed with flavor. The orange zest and juice bring a natural brightness that perfectly complements the sweet vanilla filling. Since it’s no-bake, it’s easy to make ahead, ideal for entertaining, and great for those days when I want something sweet without too much effort.
Ingredients
(Here’s a tip: Check out the full list of ingredients and measurements in the recipe card below.)
For the crust:
- Graham cracker crumbs
- Melted butter
- Sugar
For the filling:
- Cream cheese, softened
- Powdered sugar
- Vanilla extract
- Orange juice (fresh or bottled)
- Orange zest
- Whipped topping (like Cool Whip) or homemade whipped cream
- Optional: orange food coloring for a vibrant creamsicle look
Directions
-
Make the crust: I mix graham cracker crumbs, melted butter, and sugar until combined. Then I press the mixture into the bottom of a springform pan or pie dish and chill it in the fridge for at least 15 minutes.
-
Mix the filling: In a large bowl, I beat softened cream cheese until smooth. I add powdered sugar, vanilla, orange juice, and zest, mixing until creamy. For extra color, I stir in a few drops of orange food coloring.
-
Fold in whipped topping: I gently fold in the whipped topping until the mixture is fluffy and smooth, making sure not to deflate it.
-
Assemble and chill: I spread the filling evenly over the chilled crust, smoothing the top. Then I cover and refrigerate for at least 4 hours, or until set.
-
Serve: I garnish with extra whipped cream, orange zest, or orange slices before serving.
Servings and Timing
-
Servings: Serves 8
-
Prep Time: 20 minutes
-
Chill Time: 4 hours
-
Total Time: 4 hours 20 minutes
Variations
-
Layered effect: I swirl in a small amount of plain vanilla cheesecake filling for a two-tone creamsicle look.
-
Mini cheesecakes: I use a muffin tin with cupcake liners to make individual no-bake cheesecakes—great for parties.
-
Crust swap: I substitute the graham crackers with crushed vanilla wafers or Golden Oreos for a sweeter base.
-
Dairy-free version: I use dairy-free cream cheese, coconut whipped topping, and plant-based butter for a vegan-friendly version.
Storage/Reheating
I store leftovers covered in the refrigerator for up to 5 days. This cheesecake does not require reheating and is best served chilled. For longer storage, I freeze it (whole or in slices), then thaw in the fridge before serving. It holds its shape well and stays creamy even after freezing.
FAQs
Can I use bottled orange juice?
Yes, but I prefer fresh orange juice and zest for the best flavor. Bottled juice works in a pinch, especially if it’s pulp-free.
Will the cheesecake firm up without gelatin?
Yes, the whipped topping and cream cheese help it set beautifully without gelatin. Chilling it for the full 4 hours (or overnight) ensures it firms up properly.
Can I make this ahead of time?
Absolutely. I often make it a day in advance and store it covered in the fridge. It’s a perfect make-ahead dessert for events or holidays.
Is this cheesecake overly sweet?
Not at all—it’s lightly sweet with a balance of citrus and vanilla. I can adjust the sugar slightly to match my taste preferences.
Can I make it without a springform pan?
Yes, I use a regular pie dish or an 8×8 baking dish when I don’t have a springform. It still slices beautifully once chilled.
Conclusion
No-Bake Orange Creamsicle Cheesecake is a refreshing, creamy dessert that brings the nostalgic flavors of orange creamsicles into an easy-to-make treat. I love how light and bright it is, with no oven required. Whether I’m serving it at a summer barbecue, holiday party, or just as a fun weeknight dessert, this cheesecake always gets rave reviews.
Print
No-Bake Orange Creamsicle Cheesecake
- Prep Time: 20 minutes
- Cook Time: 4 hours
- Total Time: 4 hours 20 minutes
- Yield: 8 servings
- Category: Dessert
- Method: No-Bake
- Cuisine: American
- Diet: Vegetarian
Description
No-Bake Orange Creamsicle Cheesecake is a creamy, refreshing dessert that captures the nostalgic flavor of orange creamsicles in cheesecake form. With bright citrus, sweet vanilla, and a buttery graham cracker crust, this easy no-bake treat is perfect for warm days, parties, or anytime you need a chilled dessert without turning on the oven.
Ingredients
For the crust:
- 1½ cups graham cracker crumbs
- ¼ cup granulated sugar
- 6 tbsp melted butter
For the filling:
- 16 oz cream cheese, softened
- 1 cup powdered sugar
- 1 tsp vanilla extract
- ¼ cup orange juice (fresh or bottled)
- 1 tbsp orange zest
- 2½ cups whipped topping (like Cool Whip) or homemade whipped cream
- Optional: a few drops orange food coloring
For garnish (optional):
- Whipped cream
- Orange zest or slices
Instructions
- Make the crust:
In a bowl, mix graham cracker crumbs, sugar, and melted butter until combined. Press mixture into the bottom of a springform pan or pie dish. Chill in the refrigerator for at least 15 minutes. - Make the filling:
In a large bowl, beat softened cream cheese until smooth. Add powdered sugar, vanilla, orange juice, and orange zest. Mix until creamy. Add food coloring, if using, and stir to combine. - Fold in whipped topping:
Gently fold in the whipped topping until smooth and fluffy. Avoid overmixing to keep the texture light. - Assemble:
Spread the filling evenly over the chilled crust. Smooth the top with a spatula. - Chill:
Cover and refrigerate for at least 4 hours (or overnight) until set. - Serve:
Garnish with whipped cream, orange zest, or slices. Slice and serve chilled.
Notes
- Mini cheesecakes: Use a muffin tin with liners for party-perfect individual servings.
- Crust variations: Try crushed vanilla wafers or Golden Oreos for a sweeter twist.
- Vegan version: Use dairy-free cream cheese, coconut whipped topping, and plant-based butter.
- Layered look: Swirl in some plain cheesecake mixture for a two-tone creamsicle effect.
- Freeze it: This cheesecake freezes well—slice and store, then thaw in the fridge before serving.


Your email address will not be published. Required fields are marked *